Premium
Land preparation for passion fruit farming
Land preparation is a crucial step in farming.

Land preparation is a crucial step in passion fruit production, significantly contributing to maximising yield and ensuring healthy growth.
Properly preparing the land enhances soil structure, promotes efficient nutrient uptake and reduces competition from weeds. Today, we explore the steps in land preparation and the proper techniques for transplanting passion fruit seedlings to ensure a good harvest.
Preparing land for passion fruit cultivation involves several activities, including clearing, ploughing and levelling to achieve a fine tilth. Every step is designed to enhance the soil structure and suitability for crop growth.


Land clearing is the initial step. It involves removing existing vegetation, debris or obstacles that may impede crop growth. If the land if full of weeds, slashing can be done to make ploughing easier. Clearing helps to expose the soil to air and sunlight, promoting the drying of weeds and exposing pests to unfavourable conditions, effectively reducing pest population.
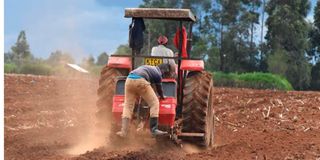
Once the land is cleared, ploughing should be done to loosen the soil and improve drainage. The soil should be dug to a depth of about 30cm using a disc plough or similar equipment.
The next step is harrowing to break up large clods of soil and create a fine tilth. This is essential for proper root penetration and moisture retention. Harrowing also helps in the further eradication of soil hardpans, ensuring better root growth and improving aeration.
Incorporating organic matter into the soil, such as compost or well-rotted manure, helps improve soil structure, water retention and nutrient availability. Before planting, mix manure and DAP (Diammonium Phosphate) into the soil. This enhances nutrient uptake by young plants and promotes early root development.
Prepare holes of about 45cm by 45cm in size at a spacing of three meters between rows and two meters between plants.
Proper spacing is crucial as it allows sufficient air circulation and light penetration, promoting healthy growth. Fill the holes with a mixture of topsoil and organic manure or compost, enhancing nutrient availability to the young plants.
Proper transplanting techniques are vital to minimise shock and ensure healthy plant establishment. Before transplanting, ensure the seedlings are well-watered to reduce shock. Transplant on a cool day or in the early morning or late afternoon to avoid heat stress.
To transplant the seedlings, gently remove them from the nursery containers, taking care not to damage the roots. Keeping the root ball intact is crucial to prevent root disturbance.
Place the seedlings in the prepared holes at the same depth they were in the nursery. Firm the soil around the roots, ensuring that there are no air pockets around the root system.
Water the transplanted seedlings immediately to settle the soil and provide the seedlings with sufficient moisture.
Protect the young seedlings from direct sunlight by providing shade during the hottest part of the day. Additionally, shelter the plants from strong winds, which can damage the delicate young vines and slow down growth.
In our next article, we shall look at the management practices carried out after transplanting.