Premium
Going on a road trip? Please go for service a week or two in advance

Pre-safari checks are a very good idea before any unusually arduous trips. But you should try to get the work done a week or two in advance, so you have some days and driving distance to check that any adjustment or repair has been done properly.
Hi Gavin, I have been told that I should never have my car serviced immediately before a long safari. Surely that is exactly when service is most important. What is your view? And if a car that is used mostly for driving to the shops, the office and for school runs is going to be used for a long-distance journey, which are the most important things to check? Geoffrey L.
Pre-safari checks are a very good idea before any unusually arduous trips. But you should try to get the work done a week or two in advance, so you have some days and driving distance to check that any adjustment or repair has been done properly.
Almost every motorist will have had the experience of collecting a car from a garage after repair, and within a few hours or days of driving away something goes wrong. All too often it will be the part that has just been fixed, or something directly related to it.
This much is a ‘must’
Any journey that is unusually long-distance or to a remote area warrants at least a thorough under-bonnet check before you set off. The levels of engine oil, radiator coolant, brake fluid, clutch fluid (or automatic gearbox ATF), power steering reservoir, and windscreen washer bottles, should all be at max. As you do the rounds, assess the condition of each fluid, too. Some batteries also need topping up, or, on no-maintenance batteries, their green indicator light checked.
Check your tyre pressures (including the spare) and consider increasing them slightly above the recommended pressure if your trip will involve sustained high speeds, a heavy load, or stony road surfaces – add about 5 per cent for each of those factors. Also, check the tyres for tread wear and any cuts or bulges in the sidewalls. Are the jack and wheel brace on board and functional?
Do a visual check around the engine compartment. Are the battery clamps tight (try and shake it; it should not move), are the terminals clean and tight (they should not move with a finger twist) is the fan belt properly tensioned (press down with your thumb; the centre of the longest span should deflect by about 1 cm, or “twist” the belt – it should turn 90 degrees but not more); do any wires have loose connections or chaffed insulation; any signs of leaks of anything from anywhere; are the radiator hoses securely clamped and is the hose rubber firm but flexible with no severe chafes, cuts or cracks; any rust stains on the radiator core or welds of the header tank?
Is the radiator cap washer still healthy and is its spring still strong but flexible? Remember wiper blades and washer nozzles.
You will probably already know if any of the driving controls are faulty but you might not be aware if, for instance, a brake light is not working. Good time to check.
While the bonnet is open, run the engine and listen for any unusual noises – rattles, clicks or squeaks.

Any journey that is unusually long-distance or to a remote area warrants at least a thorough under-bonnet check before you set off. The levels of engine oil, radiator coolant, brake fluid, clutch fluid (or automatic gearbox ATF), power steering reservoir, and windscreen washer bottles, should all be at max.
More thorough is advisable
A pre-safari check should do all that and then, one step more thoroughly, get underneath, and keep looking; for any signs of leaks or damage around the brake pipes; any oil dripping from the engine sump or gearbox, or grease oozing from a tear in a grease boot or ball-joint or seeping from a shock-absorber or the steering rack; are the exhaust brackets present and secure?
This is a good time to check the inner walls of the tyres. Also, keep a general eye out for anything else that doesn’t look right – especially things like a split pin missing from a castellated nut and anything out-of-shape. Is the suspension bump stopped in place and undamaged? Nothing obviously coming loose. Nothing cracked. No drain plugs missing from the floorplan.
If you specifically add a “bolt-check”, a mechanic will physically check the tightness of every crucial bolt (ideally with a torque spanner), and grab and shake moving parts like steering linkages, control arms, suspension mountings, and anything with a ball joint, to spot any excessive play.
It is quite a lengthy list of checks, but none of it is high-tech. These are also some of the basic checks when buying a used car, which will also include a test drive and using your ears and nose as well as your eyes.
Bear in mind that a long trip imposes stresses that daily run-arounds don’t – most especially on the cooling system and the tyres. Even if your car is in generally good day-to-day condition, it may have incipient weaknesses that are not revealed because it doesn’t work very hard and it gets frequent cool-down periods.
On a long journey, your car will often be more heavily laden and be driven at higher speeds for much more sustained periods. That will develop much higher temperatures in the tyres if they are under-inflated. Slight engine overheating that may not be noticeable on a short commuter trip could get more and more severe on a run of hundreds of non-stop kilometres. A moving part that is not adequately lubricated will also get incrementally hotter with load, time and distance.
The December holiday season is not so far away now. So start thinking about your travel plans…and schedule your pre-safari checks accordingly.
Snow tyres in Malindi?

Tyres designed to give the best performance in snow are designated as “winter tyres”, distinguished by their tolerance of very cold conditions – on snow or any other surface.
A vehicle I recently bought from Japan came fitted with “snow tyres”. I have been told they are likely to burst when they get hot on long-distance travel. Others say they are no more likely to burst than local tyres. I live in Malindi. Mary G
Tyres designed to give best performance in snow are designated as “winter tyres”, distinguished by their tolerance of very cold conditions – on snow or any other surface. They either have M+S (mud-and-snow) marked on their sidewalls if they have slightly coarser treads, or a snowflake icon if they are primarily street tyres. They are better than “summer tyres” if the road temperature is below 7 degrees centigrade, whether the surface is snow, mud, dirt, sand, stones, or tarmac (wet or dry).
That is mainly because they are treaded with a softer rubber compound formulated to remain more flexible, ensuring fuller contact with the road surface in very cold conditions. Harder compounds get too stiff in freezing temperatures.
Winter tyres will also have slightly different tread patterns, with grooves that bite into icy surfaces, and some deeper than usual channels for dispersing standing water on the road. They don’t suddenly become useless or dangerous in warmer (or even hot) weather, but they will run slightly hotter than summer tyres and will wear out significantly faster.
Of course, winter tyres would never be a “recommended” choice for Malindi, but you can confidently use the ones currently fitted to your car. When the time comes to replace them (which might be sooner than you would normally expect), fit summer tyres of whatever tread pattern best suits your motoring needs and style.
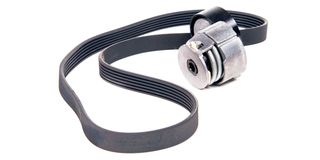
Snakes alive! What a fanbelt

Fanbelt issues are not a rare subject in chat rooms for this model, and the configuration of their two-belt arrangement operating nearly a dozen pulleys and tensioners is known in the trade as “serpentine”.
I have a Nissan Note with an HR15DE engine. Can you help me find a diagram of its fanbelt arrangement? Vicky B
That question does not come as a surprise. Fanbelt issues are not a rare subject in chat rooms for this model, and the configuration of their two-belt arrangement operating nearly a dozen pulleys and tensioners is known in the trade as “serpentine”.
So, crank up your computer and Google “Nissan Note Fanbelts” or words to that effect until you find an array of different diagrams. One of them will tally with what you have under the bonnet of your car’s particular model and year.
I would guess you are asking the question because your fanbelts have a problem, and you are either mystified by what you see when you check or you need to figure out how to replace a belt that has snapped. If the problem is a squealing noise, there is a strong possibility that your main belt is too loose (that is the most common fault reported on this model).
Tightening probably requires the tension adjuster lock-bolt to be loosened, then use a tyre lever or other pry bar to press upwards to increase tension, and while maintaining that pressure tighten the lock-bolt again. Or get a mechanic who is good at origami and crochet to help.
Seeing the light…
Which garage in Nairobi is properly equipped to carry out headlight adjustments? Hundreds of cars have misaligned headlights.
“Hundreds” is probably an underestimate. I would say thousands…perhaps tens of thousands. An internet search on “car headlight adjustment” will let you know what garages near you reckon to have the right skills and equipment to set your lights correctly and perhaps refocus them. The claim is not made by many, and the reality might be even fewer.
The DIY method is to park your car on a level ground up against a wall or garage door. Put marks on the wall straight ahead of your lights and at the same height as the bulbs. Then back-off about 15 metres and ensure the car is level front-to-back, as well as left-to-right.
On dip, the right-hand headlight should show the brightest several inches below and to the left of its mark. The left-hand light should have a flatter beam, well below the height line and pointing at the left-side edge of the road and further left.
On full beam, both bright spots should be higher and fractionally straighter ahead, but always still just below the height line.
If that is not where your lights are pointing, adjust them using the screw bolts (for up and down, left and right) which are part of the light mountings. If they won’t adjust to the correct alignment, either the mountings are damaged or the wrong lenses have been fitted.
There is a possibility that cars have had headlights replaced at some point in their lives, that cut-price lights scavenged from left-hand-drive markets have been fitted, or that symmetrical lights have been fitted on the wrong sides. However similar some headlamps (eg circular sealed beams) might look, their lens riffles make them specific to only one side of the car, and to either a keep-left or a keep-right market; not both. Some lights also have a focal adjustment.
By the way, driver age has a huge effect on visual acuity and especially problems with glare. After 45 years old is the beginning of a decline for most people. More about that, and some coping techniques, some other time.
In the pipeline: What all those alphanumerics next to car badges mean; metal versus modern plastics; tough choice between two brands; a mystery loss of power.
Do you have a Motoring question? Email [email protected]


