Premium
Which light setting should I use when driving in mist and heavy rain?

Motorists drive on a wet section of the road.
When driving in mist or heavy rain, which setting of lights should be used? Full beam, dip beam or fog lamps? Should the same settings be used whether it is night or day?
Christopher
I’m glad you did not suggest sidelights. Although anything to make you more visible is better than nothing, sidelights are seriously inadequate for driving in any poor-visibility conditions, night or day. They are only useful at night, in clear conditions, when a vehicle is parked.
When conditions are not clear (mist or heavy rain or thick dust, night or day) the default setting is dipped headlamps. They are not always optimal, but they are adequate and they are never the wrong light to use.
In the daytime, no light setting will significantly improve your ability to see. The only but absolutely essential job of your lights is to make you more visible to others. Dipped headlamps will achieve that without dazzling oncoming drivers (or unduly distracting you with reflected glare).

Motorists drive on a wet section of the road.
If the fog or dust is so thick that even oncoming headlamps are hard to see until the last moment, full beam headlamps can be considered because they are more powerful, and because the gloom is so dense they are less likely to dazzle. Case by case, test which gives you the better view ahead.
At night, as well as indicating your presence and position to others, the right settings are essential to your own ability to see where you are going.
Dipped headlamps are still the go-to option because full beam lights will impair your vision (with reflected glare). They will simply make the wall of mist and things you can already see brighter, but make the pupils of your eyes contract and not enable you to see any further forward.
Foglamps
That factor is the rationale for specialised foglamps. They are mounted low because the mist is often thinner nearer the road surface so the beam goes further (this does not apply in dust), and they are bright but do not dazzle because their beam is downward, flat and wide. If your car has purpose-designed foglamps, properly mounted, they can always be used in conjunction with dipped headlights if helpful.
In especially heavy fog, they can be used instead of headlights to minimise reflected glare and optimise forward illumination “under” the mist. But you must then keep your sidelights on so traffic behind you can see your tail lights.
Other principles for driving in fog of course include slowing down, regularly wiping your screen, and also trying not to focus on what you can see (your own bonnet!) but instead on what you can’t see deeper in the mist. Don’t look “at” things. Look “into” the oblivion.
I’m considering a paint job, and while I’m aiming for quality, I have cost in mind too…
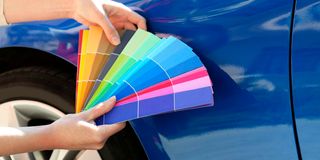
I use a pick-up for my electrical business. It is undamaged and works well but it does not look sharp for my business image. I am thinking of having it resprayed to look smarter and have my company colours. With both cost and quality in mind, what are my options? I know you do not like the word “best” when comparing options because what is best for one situation differs from what is best in other circumstances, but try.
Naim.

The only but absolutely essential job of your lights is to make you more visible to others.
Technically, there are two aspects to consider: the degree of preparation for painting, and the chemistry of the paint that you will use.
Preparation can range from a simple sanding of the existing exterior paintwork and smooth filler repair to any blemishes, to completely stripping the vehicle to its body-shell and either rubbing or media blasting until all surfaces return to original bare metal.
There are two main categories of paint chemistry – one designed to air dry, and the other designed to be baked in a booth at high temperature with low, medium and high-bake options.
One of the biggest challenges in refinishing is ensuring the paint dries very rapidly so it does not collect dust while it is still sticky. To ensure that drying speed (often in an outdoor location), air dry paint has to be specially formulated to be touch-dry almost immediately at normal room temperatures. That formula reduces sticky time to near zero, even in a jua kali yard or under a tree, but it compromises the sheen, hardness and durability of the finish.
Nevertheless, Air Dry is the quickest, simplest, lowest cost, and most universally available system. It can look good and last reasonably well if it is done expertly. It requires minimal removal of any parts, items not to be painted are simply masked. If time or economy are crucial, only the outer skin needs to be refinished, concealed parts in door panels, the boot and under the bonnet can be left as they are.
A lot of such work is done outdoors, so there is room for degrading between the end of preparation and the start of painting, and even during the painting process itself. An air-dry painter who has a sheltered clean-air booth for spraying is likely to achieve a better result than a sprayer working in a dusty and breezy yard.
At the other extreme…
High-Bake ensures rapid drying by using very high temperatures, which allows a paint formula that is glossier, harder and more durable. And much more expensive, because it not only requires an oven the size of a container (often with conditioned air immediately before and during the painting process), but also because the temperatures are too high for most non-steel parts of the car and the bodywork has to be almost completely stripped. Of course this enables the prep work to be much more thorough and the painting of every surface, nook and cranny of the bodywork.
Also, if the original paint is entirely removed, repainting will involve more layers of primer, undercoat, several top colour coats and perhaps a clearcoat. Consult your wallet.
In between these two extremes, both low and medium bake need a clean and sheltered heater-room, but will use temperatures that most components can readily tolerate without harm. For your circumstances, a good quality air-dry refinisher or a low bake finish are probably the more cost-effective options. Don’t underestimate the importance of surface preparation, whichever painting option you choose. And have any rust spots thoroughly repaired – new paint might briefly conceal them, but they will re-emerge even more seriously than before.
A bad paint job can be colourful and shiny for a while, but actually makes the vehicle look worse than no paint job at all. If you have customers who will recognise and appreciate a sharp and smart appearance, they won’t be fooled by a slap-dash facelift.
If you are going for corporate colours and perhaps elaborate signwriting as well, bear in mind what the consequences of that might be when you come to sell the vehicle. Another respray?
How tight, (or lose) should the fan belt be?
How tight should a fanbelt be? How is tension tested and does it matter if the belt is a bit loose or a bit too taut?
Peter Kimani

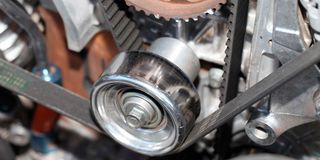
A section of a car engine showing a fan belt.
Modern fan belts are remarkably tough and reliable. They seem to last indefinitely without stretching, perishing or cracking. Almost a fit-and-forget item so adjustment is correspondingly rare.
It was not ever this way. Fan belt failures used to be so frequent that most motorists constantly carried a spare, and theories abounded on what was the best substitute if a spare was not available. Women’s nylon stockings, which fashion later replaced with tights, was a leading choice. Sourcing this remedy became the topic of much bawdy folklore.
Clever chemistry then gave us universal stretchy belts like very heavy-duty elastic bands as a quick temporary fix, but much improved materials on modern belts have largely put that trend out of business. And bawdy quips with any gender association are no longer admissible.
The correct belt tension is a balance between being tight enough not to slip in the pulley channels, but not so tight that it puts undue stress on the pulley bearings, eventually causing them to seize or snap the tensioner mountings. There’s no handy machine or gauge to measure that, but there are wide enough margins between “perfect” and “still okay” for a test-by-hand to suffice. The traditional guide is to press down with your thumb on the longest stretch of belt between pulleys. It should deflect about 1cm at the centre point.
If it does not deflect at all, loosen it. If it deflects as much as 2cms, tighten it.
Belts are multi-taskers
Belts on modern cars do a lot more work than their predecessors. On older cars they only worked the water pump to circulate coolant, the generator/alternator to charge the battery, and of course the fixed radiator fan, which is how they got their name. Early cars travelled relatively slowly, so the fan, which sucks air in through the grille, was constantly essential to increase air flow through the radiator.
Nowadays they also have to run the power-steering pump and often an air-conditioner, which is the biggest load of all, so many cars now have at least two belts and sometimes three or more. The fact that most fans now have electric motors and most of the time are switched off by a thermostat, is scant off-set for the extra loads. Some steering pumps are electric powered.
Most of the pulleys involved in running all those elements are in a fixed position, and only one, (usually the alternator), is designed to move by loosening its locking bolts and sliding it closer to the other pulleys. It is then easier to fit a new belt into the pulley grooves before levering the alternator back away from the other pulleys until the belts are taut, and then retightening the locking bolts.
Getting enough tension requires a lot of force, sometimes needing the help of a tyre lever between the alternator and the engine block. This task is easier and more exact on cars that also have intermediate “tensioners”. These should always be well loosened before moving the alternator, and then used to fine-tune the tension after the alternator has been relocked.
The tell-tale sign that belts might be too loose and slipping in the pulley grooves is a screeching sound when the engine first starts or when the engine is suddenly accelerated. The warning that belts might be too tight is less immediate and less obvious. Most likely, it will be a new “rattle” noise in the pulley or tensioner bearings…a sign that they are beginning to fail.
Servicing pulley bearings
The hard-working bearings of pulleys and tensioners are usually described as “sealed for life”, but many can in fact be serviced…which helps them work more smoothly and last longer with much less chance of failure.
Service can sometimes be done while they are still fitted to the car by removing the bearing caps and using a syringe and needle to ‘inject’ a thin lubricating oil through the edge of the rubber inner-seal into the bearing-race. If the bearing itself is removed, the rubber seal can be carefully prised out with something akin to a metal toothpick and the bearing race can be packed with fresh grease before replacing the rubber seal and bearing cap and wiping away the excess.
Most sealed-for-life bearings are filled with a lightweight lithium grease during manufacture. Heavier duty grease will benefit vehicles used in harsh conditions.
Clearly, the efficacy of this extra attention is greatest for cars that operate in especially dusty conditions or often forge through deep water.


